|
|
|
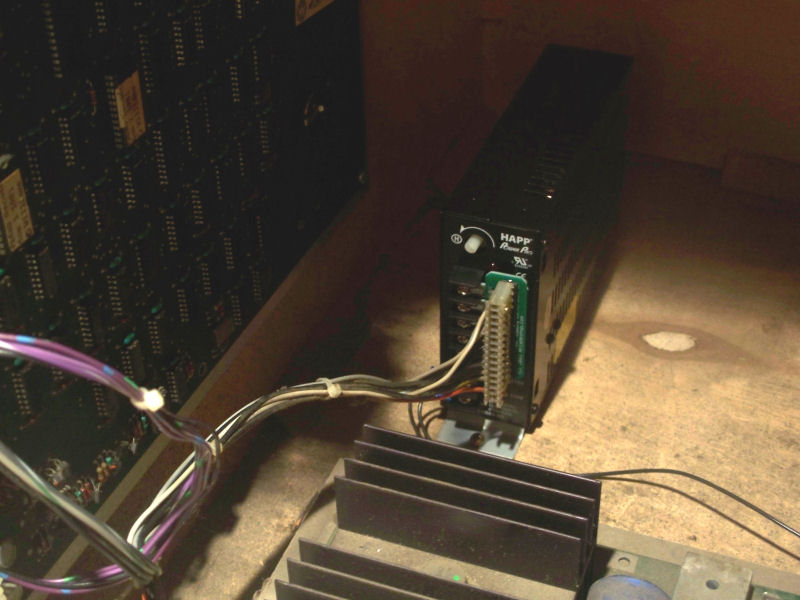
 Another machine with a problem... again. I suppose with 25 year old machines what do you expect.
One of the steering wheels in my Super Offroad stopped working. I swapped out another steering wheel
and it worked just fine, which means my problem was not on the main pcb.
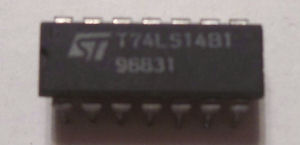
I got out my trusty multimeter and started at the optocoupler board. The voltages were a bit off. Now the optocoupler board has a 7414 IC chip
which inverts the signal, and when I originally got the game the gates on the IC were blown. I moved the wires to different gates for awhile but
apparently it decided to give me trouble again. Pictured to the right is the nasty, naughty chip that brought my steering to a halt.
I didn't have a 7114 IC chip, but I did have a 7404 which is also an inverter chip, just not with
the exact same specs. Well, I figured I might as well give it a try before placing an order and spending money. I put in the new chip, fire up the game and much to my
surprise I now have full steering again. Final note to that 7414, enjoy your new life in the silican garbage dump. Now you have been denied. Ha!
Another machine with a problem... again. I suppose with 25 year old machines what do you expect.
One of the steering wheels in my Super Offroad stopped working. I swapped out another steering wheel
and it worked just fine, which means my problem was not on the main pcb.
I got out my trusty multimeter and started at the optocoupler board. The voltages were a bit off. Now the optocoupler board has a 7414 IC chip
which inverts the signal, and when I originally got the game the gates on the IC were blown. I moved the wires to different gates for awhile but
apparently it decided to give me trouble again. Pictured to the right is the nasty, naughty chip that brought my steering to a halt.
I didn't have a 7114 IC chip, but I did have a 7404 which is also an inverter chip, just not with
the exact same specs. Well, I figured I might as well give it a try before placing an order and spending money. I put in the new chip, fire up the game and much to my
surprise I now have full steering again. Final note to that 7414, enjoy your new life in the silican garbage dump. Now you have been denied. Ha!
|
|
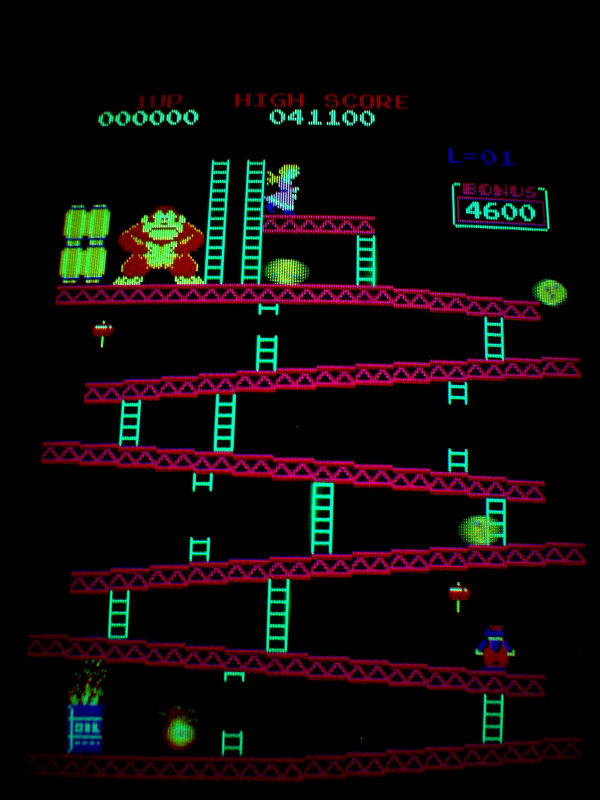 No, I'm not going to shoot it. The monitor on my Donkey Kong machine was shutting down after 10 to 15 minutes, letting the game play blind with a nice black screen. Yeah, thanks guys.
So I decide I'm going to "cap" the monitor, which means replacing all the electrolytic capacitors in the monitor with new ones in hopes of reviving the monitor. I also decide to replace
the voltage regulator which regulates the B+ voltage and could also be a culprit. I have 3 events planned in April with lots of people, and I wasn't going to have a broken Donkey Kong
machine in the bunch. No sir. So I place my order with Bob Roberts.
No, I'm not going to shoot it. The monitor on my Donkey Kong machine was shutting down after 10 to 15 minutes, letting the game play blind with a nice black screen. Yeah, thanks guys.
So I decide I'm going to "cap" the monitor, which means replacing all the electrolytic capacitors in the monitor with new ones in hopes of reviving the monitor. I also decide to replace
the voltage regulator which regulates the B+ voltage and could also be a culprit. I have 3 events planned in April with lots of people, and I wasn't going to have a broken Donkey Kong
machine in the bunch. No sir. So I place my order with Bob Roberts.
So 3 days later I receive my order with lighting speed. I wait for a rainy day... which was today... and set about capping this bad boy. Now let me tell you something about Nintendo monitors.
They are the absolute worst monitors to do a cap kit on. Those Japanese thought they built these things to last forever, so during the design phase there was absolutely no consideration for someone
who would need to take these things apart to service them. It is a nightmare to get these monitors out and ready for its first cap. 30 screws and 20 wire ties later and I had this thing apart and ready
for some soldering. It took awhile, but I finally finish the job.
So I get everything together and fire this thing up. Okay, I have a nice clean picture but I had a picture before...albeit for 10 minutes only. I do have to say the picture looked brighter and cleaner
which a cap kit will do that. So I leave the game on for 1 hour, 2 hours, 3 hours, 4 hours, 5 hours... No monitor shutdown. Mission Success!
|
|
 Why everything of course! Most arcades had some type of concession stand, some type of tables and chairs, some type of hang out area.
What's an arcade without a coke and some nachos? Where are you supposed to put it? Not on that Dig Dug cocktail or pool table if I can help it.
I'll bounce you right out of the place.
Why everything of course! Most arcades had some type of concession stand, some type of tables and chairs, some type of hang out area.
What's an arcade without a coke and some nachos? Where are you supposed to put it? Not on that Dig Dug cocktail or pool table if I can help it.
I'll bounce you right out of the place.
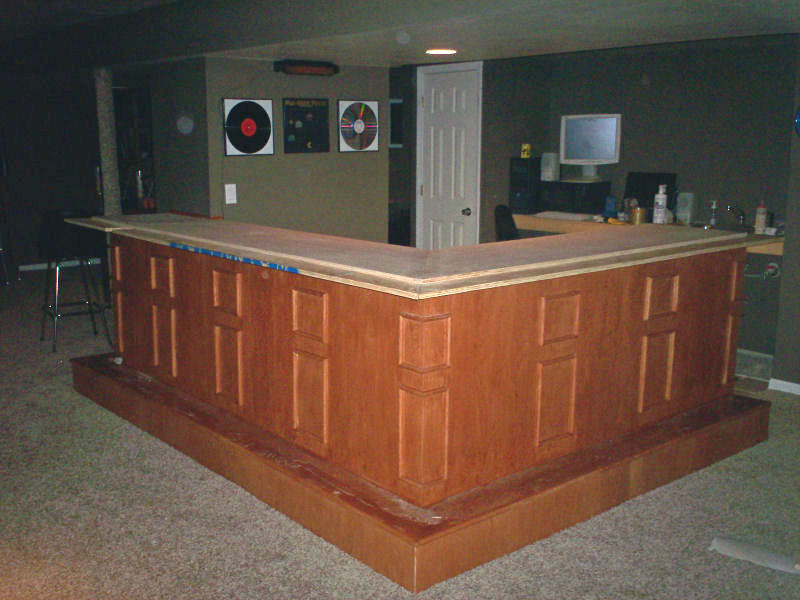
I built this snack bar in the center of the gameroom. This becomes the focal point of the whole arcade/gameroom. Its coming along nicely, as the main section has been
stained and an oak wood top has been put on. Next, the bar rail or lip for the top piece is going to be put on. What is that and what is it for? It is a lip or curved piece
of wood that gets put on the edge of the bar top. That way, if you spill a drink instead of it going on your lap or the carpet it will run backwards onto the ceramic floor.
No thank you to Pepsi on the carpet.
Finally it will all get stained to match the rest. Almost ready to do some entertaining I'll tell ya!
|
|
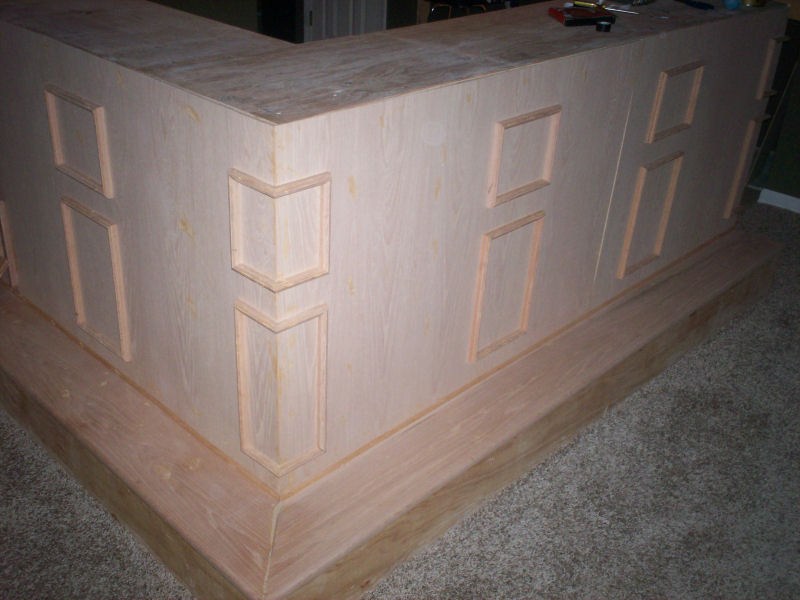 Here is a picture of the snack bar in progress. Oak wood panels have been installed, oak footboard pieces are now installed, and a nice rectangular
design has been finished. When stained the designs in the oak wood are going to really pop. I still have the top of the bar to finish, which will overhang
about 8 inches. This is the last part of the gameroom that needs to be finished and will make it an awesome hangout area.
Here is a picture of the snack bar in progress. Oak wood panels have been installed, oak footboard pieces are now installed, and a nice rectangular
design has been finished. When stained the designs in the oak wood are going to really pop. I still have the top of the bar to finish, which will overhang
about 8 inches. This is the last part of the gameroom that needs to be finished and will make it an awesome hangout area.
On a side note the knocker on my
Q*bert
stopped working. This is the thumping sound inside the cabinet that you hear when someone falls off the pyramid.
That sound is created by a solenoid that "knocks" against the wood cabinet when activated.
Q*berts
these solenoids tend to go bad over time since they
are mechanical. I was not looking forward to this as finding a suitable replacement is difficult. I opened up the cabinet and verified that good voltage was getting
to the solenoid. Next I pulled out the fuse and took a look at it. It looked good, but I checked it with a multimeter just to make sure. Certainly enough it was bad. It must
have been the original fuse from 25 years ago and eventually just decided to bite the dust. Good news is this is a 1amp slow blow fuse that are common and cheap to pickup.
After a stop at the local Radio Shack I had the
Q*bert
fully working again in no time.
|
|
 I had recently picked up an Eight Ball Action game that was originally a Donkey Kong. My plan, to turn it back into a Donkey Kong. You see I liked the game so much that when I picked up a Donkey Kong 3 at an auction
ago some time ago I immediately put Donkey Kong parts in it so I could play the game. All this time the cab still had the Donkey Kong 3 sideart, I left that alone because I knew someday it would be back. I had kept all the Donkey Kong 3 parts
for a day of reckoning.
I had recently picked up an Eight Ball Action game that was originally a Donkey Kong. My plan, to turn it back into a Donkey Kong. You see I liked the game so much that when I picked up a Donkey Kong 3 at an auction
ago some time ago I immediately put Donkey Kong parts in it so I could play the game. All this time the cab still had the Donkey Kong 3 sideart, I left that alone because I knew someday it would be back. I had kept all the Donkey Kong 3 parts
for a day of reckoning.
Today was that day.
The Donkey Kong cabinet became a Donkey Kong again. And after sitting dormant for such
a long time, the Donkey Kong 3 finally received a long awaited jolt of electricity in it circuits. Yes, the two machines have now become whole again.
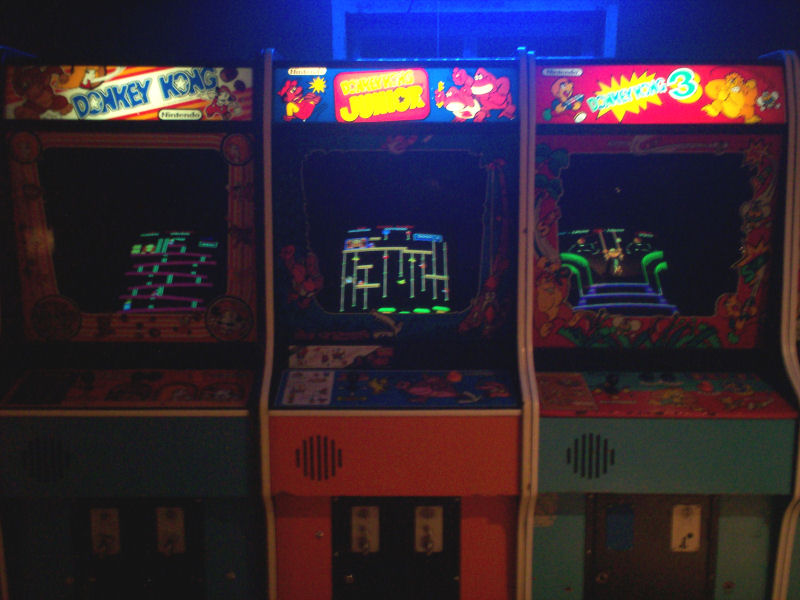
Now I have the perfect Donkey Kong trifecta, the DK, DK Junior and DK3.
Click here to see the Donkey Kong 3 page.
|
|
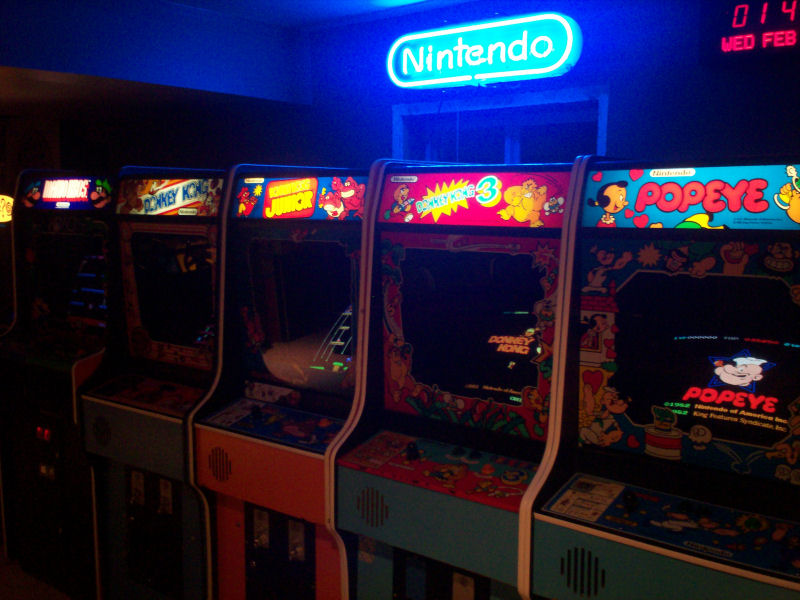
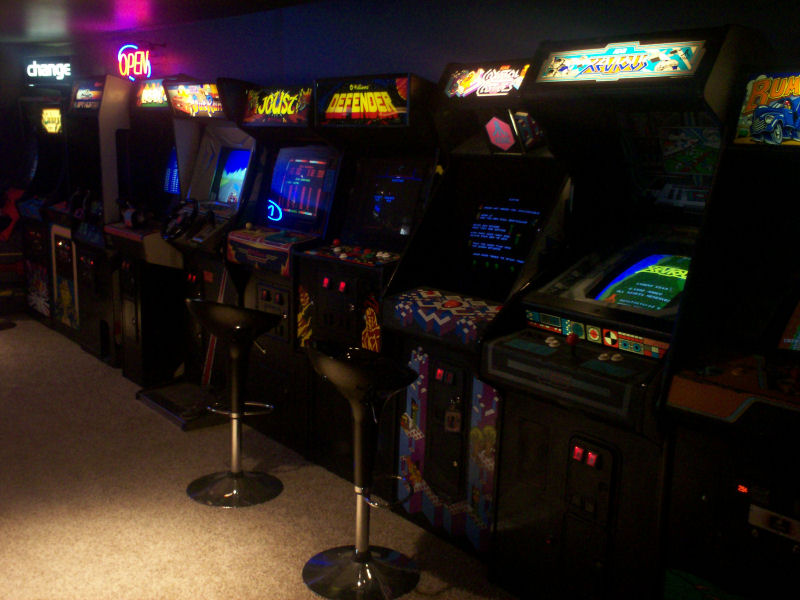
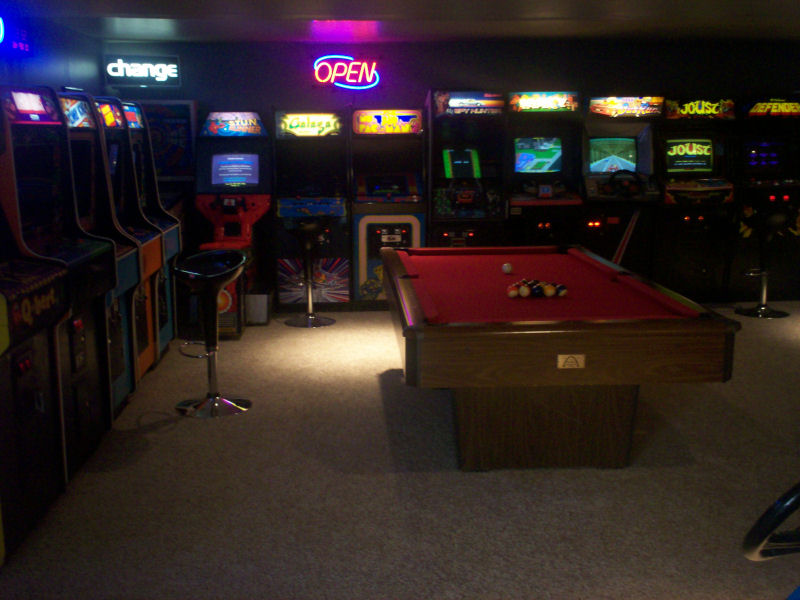
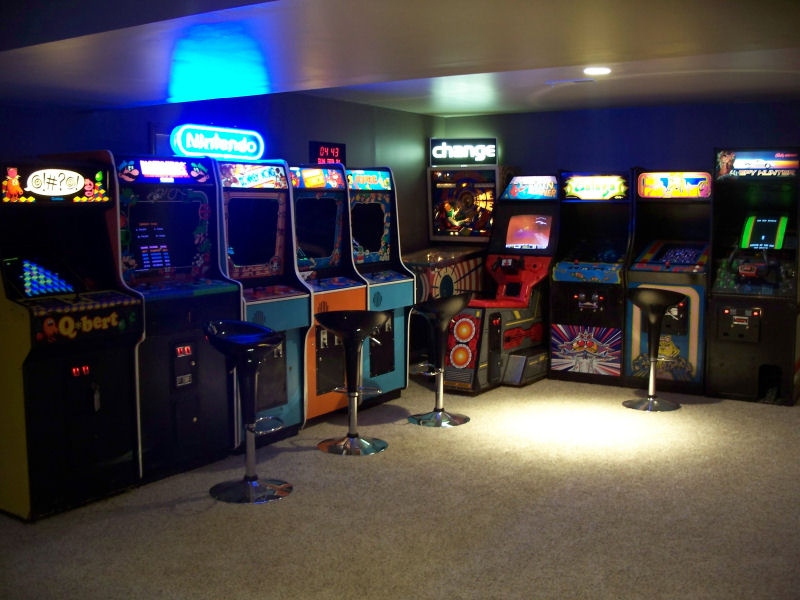
The basement arcade is nearly finished. This arcade has been christened the Vintage Vault - Arcade and Gameroom.
Below are a couple of pictures.
|
|
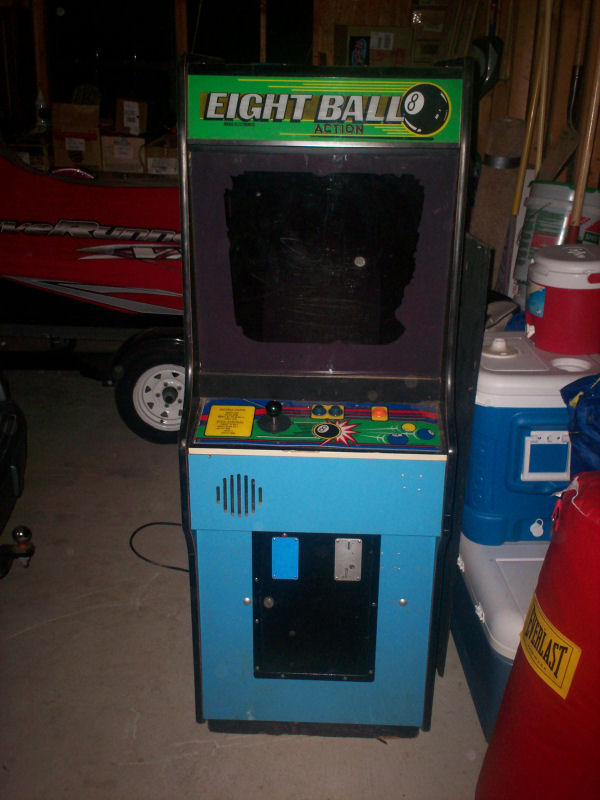 Definitely a Craigslist oddball (or shall we say eight ball). This looks like an Eight Ball Action and plays like an Eight Ball Action. However, the ID on the metal plate on the back says it is definitely a Donkey Kong.
I open up the inside and the boardset ID's it as a Donkey Kong. So what gives? Well the Eight Ball Action game was a ROM swap on Donkey Kong boards to make it
a new game so an operator can make more money.
Definitely a Craigslist oddball (or shall we say eight ball). This looks like an Eight Ball Action and plays like an Eight Ball Action. However, the ID on the metal plate on the back says it is definitely a Donkey Kong.
I open up the inside and the boardset ID's it as a Donkey Kong. So what gives? Well the Eight Ball Action game was a ROM swap on Donkey Kong boards to make it
a new game so an operator can make more money.
I have been looking for a working Nintendo cabinet to put my Donkey Kong parts in. Then I can put my
Donkey Kong 3 parts back into my current Donkey Kong cabinet. This new cabinet is in pretty good condition and the monitor is nice and bright so it makes an excellent candidate.
When finished I will have a pretty complete Nintendo classics row: Donkey Kong, Donkey Kong Jr, Donkey Kong 3, Mario Bros and Popeye.
Now here is the interesting part. When the game was upgraded (or is it a downgrade?) to an Eight Ball Action the bezel was reversed so all you see is a gray image. I took it out to reverse it back
and to my shock it is a Donkey Kong Jr bezel. So this old game was a Donkey Kong, a Donkey Kong Jr., an Eight Ball Action and now will be returned to a Donkey Kong. Also inside the cabinet was a
service tag from Carson City, Nevada. If this game could talk, I bet you it could tell some stories. Well rest easy little cabinet. You don't have to prostitute yourself any further. A Donkey Kong
you were, a Donkey Kong you will be again.
|
|
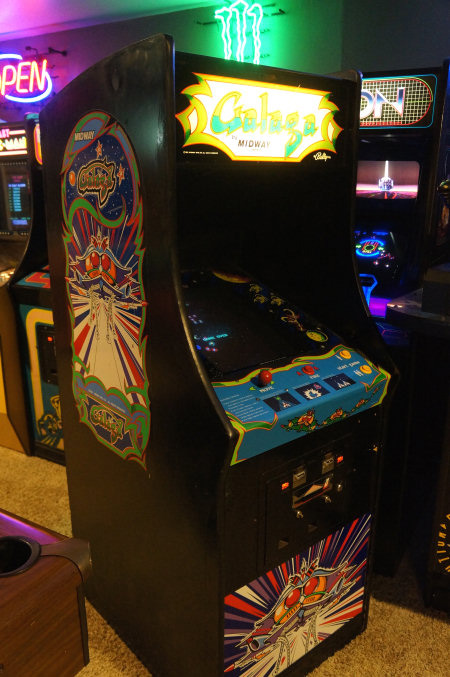 I had all the games powered up the other night and noticed the sound cutting out on the Galaga. I power cycled it a few times and then it started to freeze up
during the boot process. After restarting it 5 times in a row it would not get past the boot. At one point it froze right after showing RAM OK and ROM OK, so I know
the problem was not with RAM and ROM chips.
I had all the games powered up the other night and noticed the sound cutting out on the Galaga. I power cycled it a few times and then it started to freeze up
during the boot process. After restarting it 5 times in a row it would not get past the boot. At one point it froze right after showing RAM OK and ROM OK, so I know
the problem was not with RAM and ROM chips.
I was hoping for the best that
a few things were a bit loose inside from the move. I had replaced my PCB board in the past which was quite costly, and it had been working rock solid ever since.
I pull out the PCB and pull every IC chip off the board, and then reseated it back in its place. I then put the PCB back in.
I fire it up and bingo, working perfect.
I turn it off and on several times and it is now starting up perfectly again. Obviously the move jarred something inside, but I'm glad to be up and running again.
I throw a volt meter on the power supply just to double check and it all looked good. Viva la Galaga!
Time to try and beat my high score!
|
|
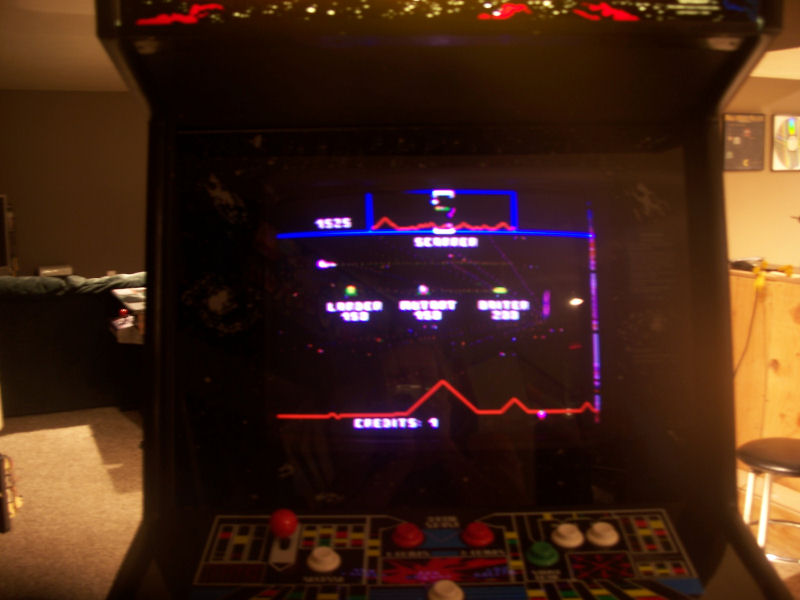
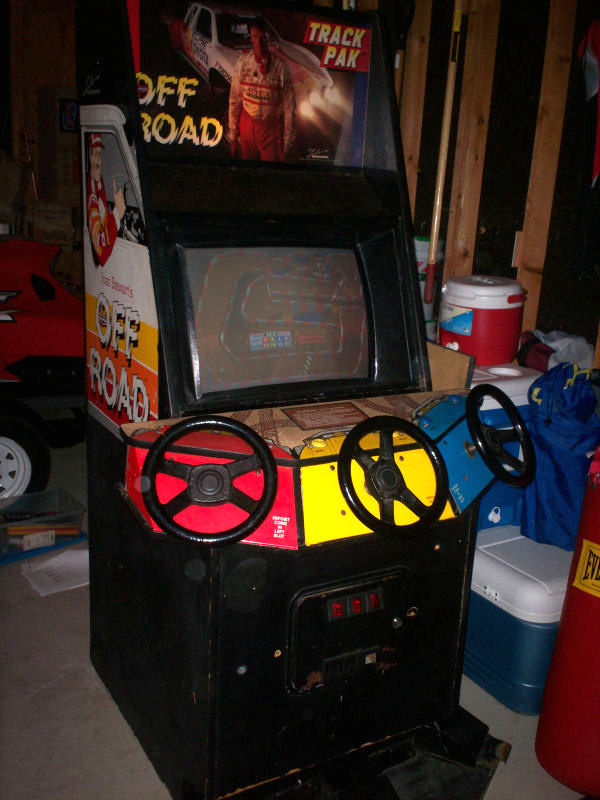 I ran across a pictureless ad on Craigslist for a non-working Super Off Road arcade game. The ad stated that the highest offer would get it. I decided
to shoot a really low ball figure to the guy, sight unseen. Much to my surprise I get a phone call saying I can come pick up the game. When I get home that night from work
I call the guy to get directions. No answer. After several emails and voice messages I figure the guy changed his mind. The next day he gives me another call. I make sure he isn't
able to back out again so I show up immediately. My guess is that he tried to make a deal with someone else for more money and it fell
through.
I ran across a pictureless ad on Craigslist for a non-working Super Off Road arcade game. The ad stated that the highest offer would get it. I decided
to shoot a really low ball figure to the guy, sight unseen. Much to my surprise I get a phone call saying I can come pick up the game. When I get home that night from work
I call the guy to get directions. No answer. After several emails and voice messages I figure the guy changed his mind. The next day he gives me another call. I make sure he isn't
able to back out again so I show up immediately. My guess is that he tried to make a deal with someone else for more money and it fell
through.
I get the game home and noticed the first problem. Everything inside is disassembled and wires are cut in places. It looks like the previous owner tried a bit of a do-it-yourself
and miserably failed. Well, thanks for letting me know. Anyways, I bolt everything down, put in a used switching power supply, wire everything back together and fire the machine up.
What do you know, the sound comes on and after a few monitor tweaks I get a picture on the screen. I'm almost stoked at this point and go to play a game. Much to my dismay the steering
wheels aren't working. I check the wiring and its still a no go. After much troubleshooting I finally get the steering working again.
This is awesome, I now have a fully working 3 player Off Road game.
To read more about it click here.
|
|
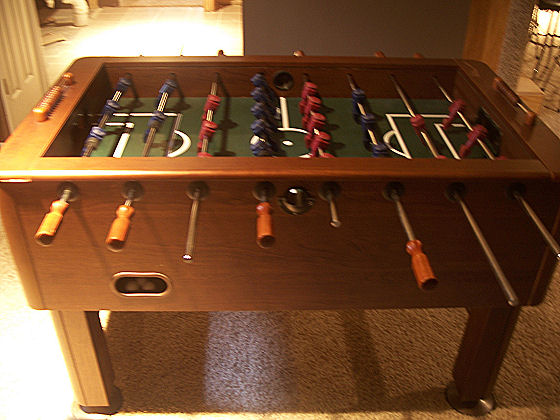 No it is not. But I brought that Harvard bad boy down into the gameroom anyways. It is one solid piece of work, definitely built to withstand
a beating. I couldn't pass up an offer to bring it home so I spent 4 hours round trip picking this one up. Unfortunately it wouldn't fit in my van
even with the legs off so I had to disassemble the entire game rods and all. When I got it home I then had to reassemble it together again.
No it is not. But I brought that Harvard bad boy down into the gameroom anyways. It is one solid piece of work, definitely built to withstand
a beating. I couldn't pass up an offer to bring it home so I spent 4 hours round trip picking this one up. Unfortunately it wouldn't fit in my van
even with the legs off so I had to disassemble the entire game rods and all. When I got it home I then had to reassemble it together again.
What are you waiting for? Come on down and challenge me to a game!
|
|
 When moving to the new house, all the games were kept in the garage while the basement arcade was under construction. Once completed, all the games
were moved into the arcade.
When moving to the new house, all the games were kept in the garage while the basement arcade was under construction. Once completed, all the games
were moved into the arcade.
Out of 24+ games that made the move, Defender is the only game that didn't make it. During the cocoon stage in the garage, a few times
I powered up some of the games to play during the construction phase. It turns out, Defender would not power up.
After throwing a voltmeter on the power supply it turns out there was no +5v. I didn't want to rebuild the linear power supply so I
opted to put in a new switching power supply for reliability.
The new power supply and converter board arrived today so I installed it in the game. I installed the new switcher and the
game fired right up!
For good measure, the old power supply was left in the game for any future purists that may own this game.
All games in the gameroom are now in working order. Awesome!
|
|
 The ceramic tile has now been installed for the bar area. It's all coming together and looking good.
Still need to do the wookwork for the bar and install new windows. The windows were special ordered to fit
and were picked up today. Just need to find the time to get them installed with trimwork.
The ceramic tile has now been installed for the bar area. It's all coming together and looking good.
Still need to do the wookwork for the bar and install new windows. The windows were special ordered to fit
and were picked up today. Just need to find the time to get them installed with trimwork.
On a bright note all arcade machines have now been moved into the gameroom. The ground froze hard enough to move
them with a dolly from the garage to the walkout basement. Upon powering everything up I had 3 casualties from the
house move. The video card in the Mame machine came loose and was an easy fix. The Outrun lost power and a quick check
found a loose wire in the power plug. 10 minutes later and that one was working also. Unfortunately the Defender is the
last one not working. After checking it out it appears the +5V from the power supply isn't working, but the other voltages
are. I thought of rebuilding the power supply but in the end I decided to order a new switching power supply with a special wiring
adapter for a Defender. When power is concerned I'd rather have stability instead of rebuilding faulty components.
|
|
 The baseboard has now been installed so this weekend I was able to move half my games into The Basement Arcade. This was the half that I could get down
the steps without too much difficulty. The others will have to wait until the snow on the ground dries up so I can come in through the walkout basement.
Not shown but now down in the arcade are Dig Dug, Open Ice, Pub Time Darts and the Megatouch Sapphire II touchscreen.
The baseboard has now been installed so this weekend I was able to move half my games into The Basement Arcade. This was the half that I could get down
the steps without too much difficulty. The others will have to wait until the snow on the ground dries up so I can come in through the walkout basement.
Not shown but now down in the arcade are Dig Dug, Open Ice, Pub Time Darts and the Megatouch Sapphire II touchscreen.
Those games sure look good all lined up. Awesome!
|
|
|